Posterior Predictive in INLA

Uncelebrated Greatness

This is a general impression I get. For some reason, introductions to parametric Bayesian models often skip over some of their most powerful features.

  • Online learning is easy, because old findings and new data are combined by Bayesian updating.
  • Generating new data is easy.
  • Quantifying the probability of a new observation is easy.
  • Tracking uncertainty accurately is easy.

Experts in Bayesian modeling are so used to these features that they don’t consider them remarkable. I often wind up spending more time figuring out the details of these steps after toolkit introductions walk through the steps below.

  • Specify a model by selecting a parametric random distribution
  • Fit the parameters of the model to some data
  • Use a metric like DIC or WAIC to compare it to a couple other possible models

Those are important steps, but the posterior predictive distribution completes the Bayesian workflow, and Bayesian updating of the model keeps the model accurate after new data comes in.

This blog checks out INLA as a tool and peeks into the use of the posterior predictive distribution. It doesn’t cover Bayesian updating.

INLA

Integrated nested Laplace approximation (INLA) is covered in a book that just came out last month, Bayesian Regression Modeling with INLA. I’m enjoying reading it. It does a great job relating different families of generalized linear model to their respective applications.
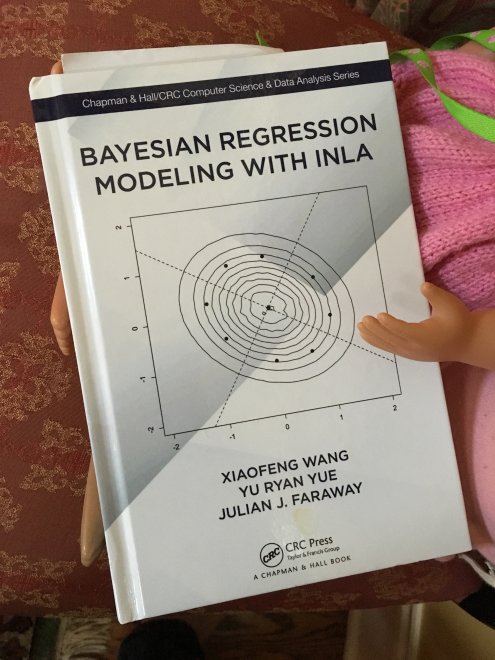
brinla cover

brinla cover

The promise of INLA is much faster inference through approximation instead of more computationally expensive methods.

I was disappointed, though, that the book recommended re-fitting the model in order to make predictions for new predictor values (by specifying NA as the result). Here I’m calling the “dependent variable” or “model output” the result, and I’m calling the “covariates” or “independent variables” the predictors.

Re-fitting the model is easy and fine for small models, but when there’s tons of data, or when the data is no longer available, or when there’s a lot of computation to do and you need to move quickly, it’s important to know that there are other possibilities.

Any Bayesian model has a “posterior predictive” distribution, the probability distribution that you get by integrating over all the parameters of the posterior distribution. The posterior predictive is the one that’s great for generating fake data and for determining how probable a new observation is.

It took a while to figure out how to use the posterior predictive distribution given a fitted INLA model. I got significant assistance from the INLA help mailing list. I review what I learned below.

Data and model

For the example below, I use a simple univariate linear model with noise, but INLA handles much more complex models. Here is the “ground truth” data, representing real-world measurements.

N <- 100
x <- 1:N
y <- 5 + 4 * x + rnorm(N, sd=3)

The true parameters are the following.

  • The intercept is 5.
  • The coefficient of the predictor is 4.
  • The standard deviation of the noise is 3.

Next, we fit an INLA model and check out the posterior distributions for the parameters.

library(INLA)
## Loading required package: sp
## Loading required package: Matrix
## This is INLA_17.06.20 built 2018-03-14 23:31:50 UTC.
## See www.r-inla.org/contact-us for how to get help.
m <- inla(y ~ x, data=data.frame(x=x, y=y))
summary(m)
## 
## Call:
## "inla(formula = y ~ x, data = data.frame(x = x, y = y))"
## 
## Time used:
##  Pre-processing    Running inla Post-processing           Total 
##          0.7702          0.1244          0.2804          1.1749 
## 
## Fixed effects:
##               mean     sd 0.025quant 0.5quant 0.975quant   mode kld
## (Intercept) 4.7720 0.5813     3.6282   4.7720     5.9146 4.7720   0
## x           4.0053 0.0100     3.9856   4.0053     4.0249 4.0053   0
## 
## The model has no random effects
## 
## Model hyperparameters:
##                                           mean     sd 0.025quant 0.5quant
## Precision for the Gaussian observations 0.1227 0.0171     0.0913   0.1222
##                                         0.975quant   mode
## Precision for the Gaussian observations     0.1585 0.1215
## 
## Expected number of effective parameters(std dev): 2.00(0.00)
## Number of equivalent replicates : 50.00 
## 
## Marginal log-Likelihood:  -268.32

The model summary can be interpreted as saying the following.

  • The intercept has 95% probability of falling between 3.1424 and 5.6429.
  • The coefficient of the predictor variable has a 95% probability of falling between 3.9915 and 4.0345. (The model is pretty sure about this one.)
  • The “noise” is characterized by precision.

INLA likes to report precision. Standard deviation is more familiar to me. The mean precision, when converted to standard deviation, is close to the true standard deviation used to generate the noise.

sqrt(1 / 0.0999)
## [1] 3.16386

There’s a convenience function in the brinla R package that supports the book. It reports standard deviation.

library(brinla)
bri.hyperpar.summary(m)
##                                      mean        sd   q0.025     q0.5
## SD for the Gaussian observations 2.876217 0.2036968 2.511406 2.861232
##                                    q0.975     mode
## SD for the Gaussian observations 3.314951 2.821355

You can also plot the density of the whole posterior distribution for the standard deviation.

bri.hyperpar.plot(m)
## Loading required package: ggplot2

It can also plot the posterior distributions of the model coefficients.

bri.fixed.plot(m)

You can plot the Bayesian Pearson residuals, which will be distributed vertically in a Gaussian way, unless there’s something your model isn’t taking into account but needs to.

bri.lmresid.plot(m, x, xlab="x", smooth=TRUE)

The residuals look Gaussian throughout the range of the predictor variable, which is good.

Sampling

There is a function in the INLA package that can sample from the joint posterior distribution of a fitted INLA model. It is called inla.posterior.sample. The first thing it’s likely to say to you is the error below.

sim <- inla.posterior.sample(200, m)
## Error in inla.posterior.sample(200, m): You need an inla-object computed with option 'control.compute=list(config = TRUE)'.

This time I use the option that allows sampling from the posterior.

m <- inla(y ~ x, 
          data=data.frame(x=x, y=y),
          control.compute=list(config=TRUE))
sim <- inla.posterior.sample(N, m)

I could have used a different number of simulated samples than N, but for the plot later, it’s convenient to use the same number.

The resulting object is a data structure that I found pretty intimidating at first.

length(sim)
## [1] 100
str(sim[[1]])
## List of 3
##  $ hyperpar: Named num 0.122
##   ..- attr(*, "names")= chr "Precision for the Gaussian observations"
##  $ latent  : num [1:102, 1] 9.32 13.31 17.3 21.29 25.28 ...
##   ..- attr(*, "dimnames")=List of 2
##   .. ..$ : chr [1:102] "Predictor:001" "Predictor:002" "Predictor:003" "Predictor:004" ...
##   .. ..$ : chr "sample1"
##  $ logdens :List of 3
##   ..$ hyperpar: num 3.13
##   ..$ latent  : num 463
##   ..$ joint   : num 466

It turns out that the last items in the named-numerical vector called latent contain samples for the parameters of the model.

s <- sim[[1]]$latent
tail(s[,1], n=3)
## Predictor:100   (Intercept)             x 
##    404.532084      5.324567      3.992068

By using lapply, a function can grab those values from each sample by name, so that we can have parameters for the model sampled from the posterior distribution according to their posterior probability.

a <- unlist(lapply(sim, function(s) s$latent["(Intercept)", 1]))
b <- unlist(lapply(sim, function(s) s$latent["x", 1]))

The noise is retrieved from a hyperparameter in a similar way.

sigma <- unlist(lapply(sim,
                       function(s) 1/sqrt(s$hyperpar["Precision for the Gaussian observations"])))

Now we can generate data from the posterior predictive distribution. It ought to look like the original “ground truth” data.

y.sim <- a + b * x + rnorm(N, sd=sigma)

I use dplyr::bind_rows to put together the original data and the generated data, to check that they look about the same.

library(ggplot2)
library(dplyr)
## 
## Attaching package: 'dplyr'
## The following objects are masked from 'package:stats':
## 
##     filter, lag
## The following objects are masked from 'package:base':
## 
##     intersect, setdiff, setequal, union
d <- bind_rows(list(original=data.frame(x=x, y=y), 
                    generated=data.frame(x=x, y=y.sim)),
               .id="data.type")
ggplot(d, aes(x, y, color=data.type)) + geom_point()

This post is getting long, so I won’t use the predictive posterior to quantify the probability of new values of the dependent variable given associated predictors.

Trickery

One of the authors of Bayesian Regression Modeling with INLA, Julian Faraway, suggests that sampling is at odds with the spirit of INLA, an approximation method.

He creates a “random effect” variable in the model and uses that instead of the precision hyperparameter we used above. I do understand that step, because the book has many examples like it.

I am not yet sure, though, when it’s possible to use this approximation of the posterior predictive and when it breaks down.

Here is a link to the page, where you can find “trickery” in your browser to go to the part I’m talking about.

http://www.maths.bath.ac.uk/~jjf23/brinla/chicago.html

MOE Multivariate Optimization via REST

Using MOE to Optimize in Two Dimensions

Have you ever suddenly realized that you’ve spent more time than you planned tweaking the hyperparameters of a complex neural network? Wouldn’t it be nice to let software figure it out? Not just with an exhaustive grid search, but in a smart way.

It has been done.

I noticed a great blog post on a subject I’ve been meaning to get around to ever since Ryan Adams mentioned it on the Talking Machines podcast. I can’t find the episode right now, so here’s a paper: Practical Bayesian Optimization of Machine Learning Algorithms.

The blog post is here: Bayesian optimisation for smart hyperparameter search, by Tim Head, 2015.

It’s a great post. It explains how Gaussian Processes are good at guiding the search through the space of hyperparameter settings. But while it uses a Python package called george, it recommends another package for production use, namely MOE.

I wanted to use MOE, but it recommended docker, and I hadn’t yet decided to drink that Koolaid. Recently I consumed a few pitchers of docker Koolaid, though, so I ran the MOE docker container and had a REST server on localhost port 6543.

sudo docker pull yelpmoe/latest
sudo docker run -p 6543:6543 yelpmoe/latest

Pretty Endpoints

MOE has a C++-based optimizer that is exposed via a Python-based REST API server. The API comes with an interesting feature, pretty endpoints. If there’s an endpoint, /foo, then you can visit /foo/pretty in your web browser and see an interactive example. The page has example JSON that you can submit, edit, and resubmit.

It’s pretty cool, but it left me wishing for a more traditional API reference when I wanted to go from a one-dimensional search to a two-dimensional search.

The REST client that comes with MOE is pretty well documented, so I ran another copy of the MOE container.

sudo docker run -it -u root -v ~/experimental/moe-user:/mnt --entrypoint=/bin/bash yelpmoe/latest

In there, I hacked the Python REST client to log its JSON messages to a file in /tmp and examined that when running the example 2D search that comes with MOE. Then I saw the format I had to use.

{"domain_info": {"dim": 2, "domain_bounds": [{"max": 5.0, "min": -5.0}, {"max": 5.0, "min": -5.0}]}, "gp_historical_info": {"points_sampled": []}, "num_to_sample": 1}

I already guessed that you have to say that "dim" is 2, but I noticed that you also have to provide a min and max pair for each dimension.

Something to Optimize

I wanted to have a function with local minima and a global minimum, so I added a cosine to a parabola.

library(ggplot2)

true.fn <- function(x) {
    d <- sqrt(sum(x^2))
    y1 <- d^2 / 100
    y2 <- cos(d) / -4
    (y1 + y2)
}

grid <- function(x, y) {
    m <- matrix(nrow=length(x) * length(y), ncol=2)
    rowi <- 1
    for (i in 1:length(x)) {
        for (j in 1:length(y)) {
            m[rowi,] <- c(x[i], y[j])
            rowi <- rowi + 1
        }
    }
    m
}

domain <- function() {
    x <- seq(-20, 20, by=0.5)
    y <- x
    grid(x, y)
}

mk.data <- function() {
    m <- domain()
    m <- cbind(m, apply(m, 1, true.fn))
    colnames(m) <- c("x", "y", "z")
    data.frame(m)
}

show <- function() {
    ggplot(mk.data(), aes(x=x, y=y, z=z)) + geom_contour()
}

show.x <- function() {
    d <- mk.data()
    ggplot(d[d$y == 0,], aes(x=x, y=z)) + geom_line()
}

show.x()

It’s easier to see in one dimension, but it’s a two-dimensional function.

show()

Any Client

Now I wanted to try out MOE from Python but without using their Python library. It sounds odd, but consider that 1) I might want to use some other language, maybe one that isn’t out yet, and 2) I have been using Python 3 preferentially, and their Python REST client libraries seem more comfortable with Python 2.7.

Here’s the code that uses JSON directly.

#! /usr/bin/env python2.7

from __future__ import print_function

import json
import math
import os
import requests

from addict import Dict
import click
import numpy as np


API = 'http://localhost:6543/gp/next_points/epi'


def true_fn(point):
    d = np.sqrt(
        pow(np.array(point, dtype=np.float32), 2).sum())
    y1 = pow(d, 2) / 100
    y2 = math.cos(d) / -4
    return y1 + y2


@click.option(
    '--max-iter', default=3
)
@click.option(
    '--verbose', default=False, is_flag=True
)
@click.command()
def main(max_iter, verbose):
    exp = Dict({
        "domain_info": {
            "dim": 2,
            "domain_bounds": [
                {"max": 20.0, "min": -20.0},
                {"max": 20.0, "min": -20.0},
            ]
        },
        "gp_historical_info": {
            "points_sampled": [],
        },
        "num_to_sample": 1,
    })
    best_point = None
    best_val = None
    for i in range(max_iter):
        if verbose:
            print(json.dumps(exp))
        r = requests.post(API, data=json.dumps(exp))
        if verbose:
            print(r.text)
        nextpt = [float(i)
                  for i in json.loads(
                          r.text)['points_to_sample'][0]]
        val = true_fn(nextpt)

        s = ''
        if best_point is None or val < best_val:
            best_point = nextpt
            best_val = val
            s = '  ... A WORLD RECORD!!!'

        print('f({}) = {}{}'.format(nextpt, val, s))

        exp.gp_historical_info.points_sampled.append({
            "value_var": 0.01,
            "value": val,
            "point": nextpt,
        })


if __name__ == '__main__':
    main()

Yeah, yeah. I know—I used Python 2.7 right after I said I prefer Python 3. Call me a hypocrite. The point is that anything can print JSON.

The output looks something like this:

ecashin@montgomery:~/experimental/moe-user$ ./useapi_2d.py --max-iter 20
f([-19.4211329705, 16.1817903783]) = 6.14297928492  ... A WORLD RECORD!!!
f([-10.1536519406, -14.1447713031]) = 2.99854690833  ... A WORLD RECORD!!!
f([-4.08891069113, -7.77026636892]) = 0.970837639895  ... A WORLD RECORD!!!
f([7.89655712959, -16.2536583322]) = 3.0875048342
f([0.557183035696, 0.089724831252]) = -0.208047592448  ... A WORLD RECORD!!!
f([-1.17069715023, 0.183623456291]) = -0.0800293795817
f([-0.0212410306582, -1.56499600174]) = 0.023082594082
f([0.225741656362, 1.78274736612]) = 0.0883571884112
f([2.30178362082, 0.260580016253]) = 0.223280866099
f([-3.75559521582, -1.26936274927]) = 0.327215201349
f([1.07484307288, 13.7023252526]) = 1.79340747812
f([12.1463972019, 12.6231103474]) = 3.0095546387
f([19.2194897527, 3.76973996397]) = 3.65073229955
f([18.9615251931, -12.2498296432]) = 5.30466432742
f([-13.0612450007, 5.59698062173]) = 2.03739960908
f([-8.39848964969, 14.0978753142]) = 2.88374592401
f([-18.7357357443, -11.5192903881]) = 5.08721754187
f([17.4818277491, 19.9567035878]) = 6.99587824901
f([-2.03383613494, -18.024251427]) = 3.1006606068
f([7.36148447862, -7.24269082653]) = 1.2214368028
ecashin@montgomery:~/experimental/moe-user$ 

If I increase the number of iterations, I can see that MOE jumps around a lot in the little box from \((-20, -20)\) to \((20, 20)\). It quickly finds some pretty good points but then spends a lot of time trying different combinations of coordinates.

If I change the output to CSV, I can plot the search by using gganimate for the first time ever.

library(dplyr)
## 
## Attaching package: 'dplyr'
## The following objects are masked from 'package:stats':
## 
##     filter, lag
## The following objects are masked from 'package:base':
## 
##     intersect, setdiff, setequal, union
library(ggplot2)
library(gganimate)

d <- read.csv('search.csv', header=TRUE)
p <- ggplot(d, aes(x=x1, y=x2, frame=iter, label=iter, cumulative=TRUE)) +
  geom_text()

Then I call gganimate() to get the gif below.

search sequence

search sequence

I think that it has to explore all the gaps because I intentionally made the search hard.

Easier Optimization

If I modify the true function to remove the bumps, leaving only a parabola, the optimizer has an easier job to do.

def true_fn(point):
    d = np.sqrt(
        pow(np.array(point, dtype=np.float32), 2).sum())
    y1 = pow(d, 2) / 100
    # y2 = math.cos(d) / -4
    return y1 #  + y2

Running the optimizer one hundred times, I get search-easy.csv, and I recreate the gganimate plot below.

easier search sequence

easier search sequence

It looks like it still doesn’t trust the easy answer. If it was just descending the gradient it would just shoot right on down the hill to the origin, but it’s skeptical, like it doesn’t want to miss a little unexpected minimum in a less well expored part of the manifold.

Scaling Up

The whole point is that the function is expensive to evaluate, so it isn’t that big a deal if there’s some latency going through REST. Still, I want to get some idea of how many dimensions I can expect to use with a “reasonable” query time, and how many points I can add before things get unwieldy.

I go to 100 points for each of 4, 8, 16, \(...\), 512 dimensions. For each iteration, a point is added to the historical information, and the query time in milliseconds is reporting.

The plot below is surprising. Four dimensions is very slow (as was two); however, higher numbers of dimensions enjoy quicker queries. Maybe MOE switches strategies for higher numbers of dimensions.

d <- read.csv("scale-up.csv", header=TRUE) %>% mutate(ndim=factor(ndim))
ggplot(d, aes(x=iter, y=query_msecs, color=ndim)) + geom_point()

The final version of the Python script is shown below.

#! /usr/bin/env python2.7

from __future__ import print_function

import json
import math
import os
import requests
import time

from addict import Dict
import click
import numpy as np


API = 'http://localhost:6543/gp/next_points/epi'


def true_fn(point):
    d = np.sqrt(
        pow(np.array(point, dtype=np.float32), 2).sum())
    y1 = pow(d, 2) / 100
    y2 = math.cos(d) / -4
    return y1 + y2


@click.option(
    '--max-iter', default=3
)
@click.option(
    '--verbose', default=False, is_flag=True
)
@click.option(
    '--n-dim', default=2
)
@click.command()
def main(max_iter, verbose, n_dim):
    exp = Dict({
        "domain_info": {
            "dim": n_dim,
            "domain_bounds": []
        },
        "gp_historical_info": {
            "points_sampled": [],
        },
        "num_to_sample": 1,
    })
    for _ in range(n_dim):
        exp.domain_info.domain_bounds.append(
            {"max": 20.0, "min": -20.0})
    best_point = None
    best_val = None

    print('iter,ndim,query_msecs')

    for iter in range(max_iter):
        if verbose:
            print(json.dumps(exp))
        start = time.time()
        r = requests.post(API, data=json.dumps(exp))
        query_msecs = (time.time() - start) * 1000

        if verbose:
            print(r.text)
        nextpt = [float(i)
                  for i in json.loads(
                          r.text)['points_to_sample'][0]]
        val = true_fn(nextpt)

        if best_point is None or val < best_val:
            best_point = nextpt
            best_val = val

        print('{},{},{}'.format(
            iter,
            n_dim,
            query_msecs))

        exp.gp_historical_info.points_sampled.append({
            "value_var": 0.01,
            "value": val,
            "point": nextpt,
        })


if __name__ == '__main__':
    main()